User Login
This should be the first page you see whenever accessing ePRco:
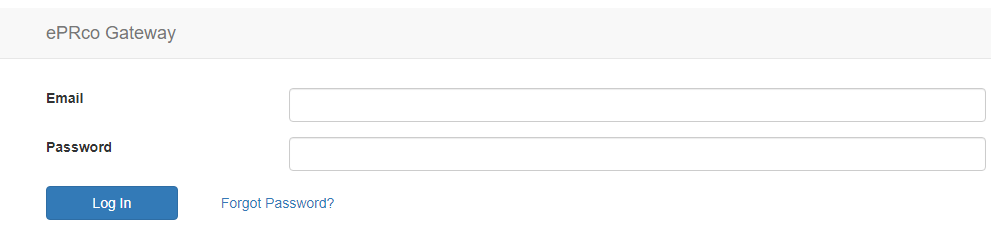
If you do not have a password or if you have forgotten your password, enter the email used for registration and clink on the link above that says “Forgot Password?”.
Once you login, you should see the screen below:
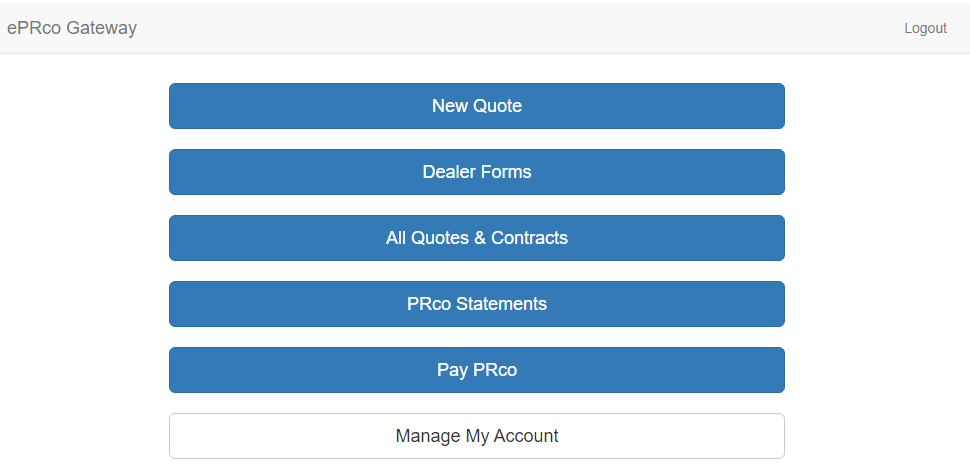
Next we are going to cover the use of each of the options. We will be covering how to use the website to quote and issue PRco, Inc.’s products, but we will not be covering the products themselves.
Quotes & Contracts
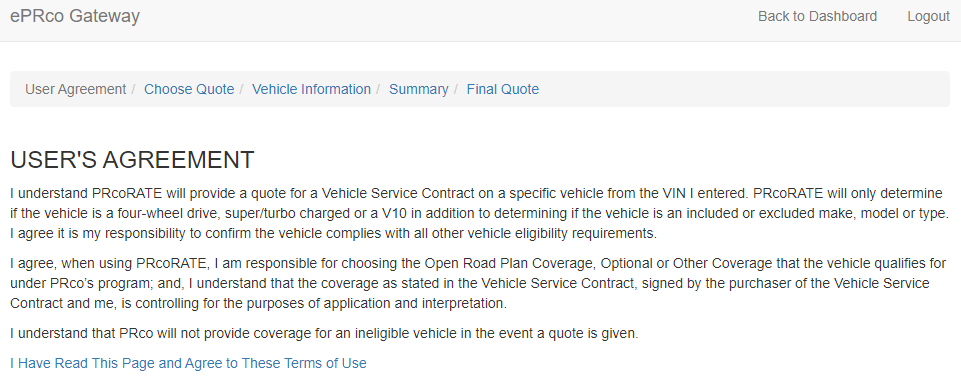
New Quote Button: The first page you see is the User Agreement, which outlines the terms of use and limitations that using this web application has for the dealership. As always your signed Dealer Agreement with PRco is the final authority:
Clicking on the link (“I Have Read This Page and Agree to These Terms of Use”) means you agree to the terms and you will go to the ePRco page to get your dealer costs for PRco Contracts. Once you click on the link, you will arrive at the screen in the image below.
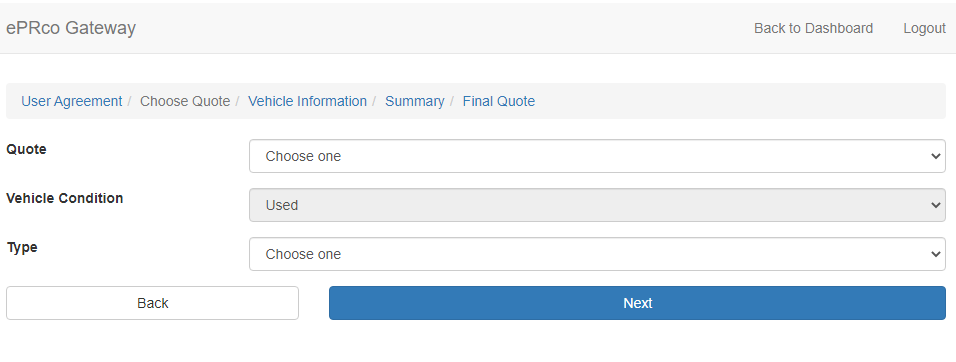
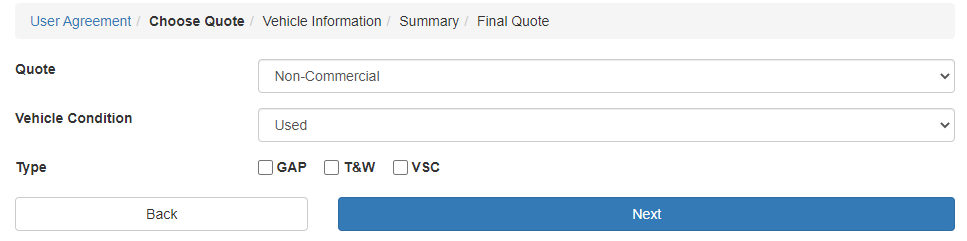
First, choose if the vehicle will be used as commercial or non-commercial as shown below:

Second, choose which contracts you are rating and possibly issuing for this vehicle and then click “Next”.
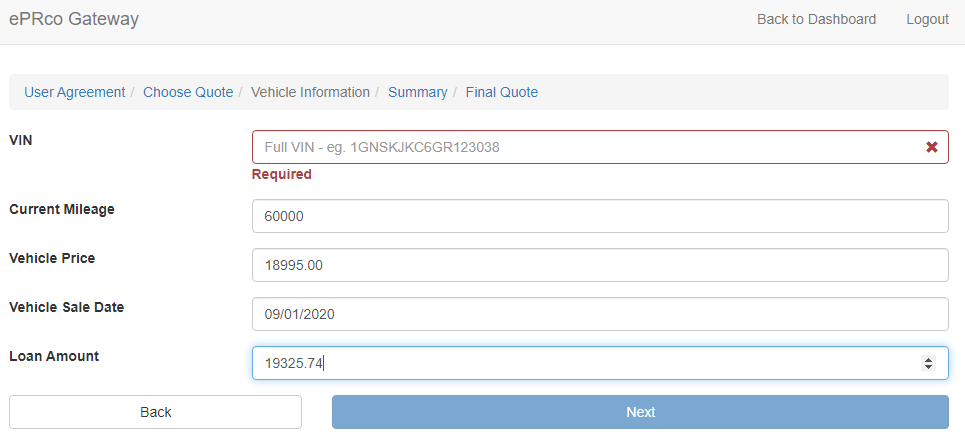
On the next screen you will enter the VIN, Mileage, Vehicle Price, and choose the date of sale. If you are selling a GAP contract, you will also need to enter the loan amount as shown below. Once you have entered the information, Click on “Next” to retrieve your quote:
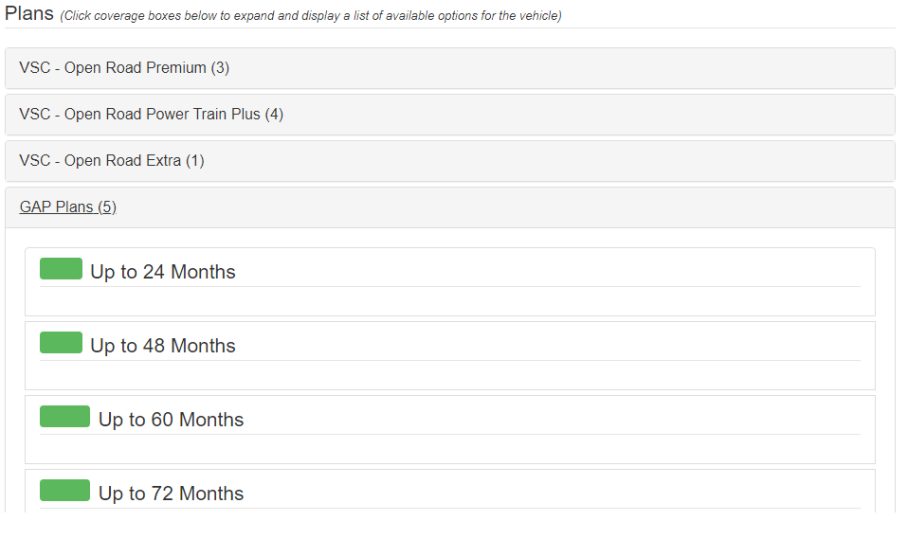
If the vehicle qualifies for coverage, the coverages and terms that the vehicle qualifies for will be listed in the bottom half of the page as shown in the images below:
VSC:
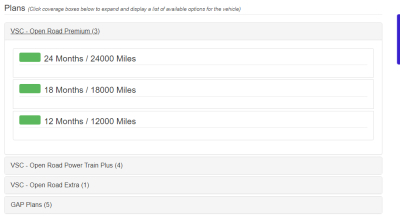
GAP:
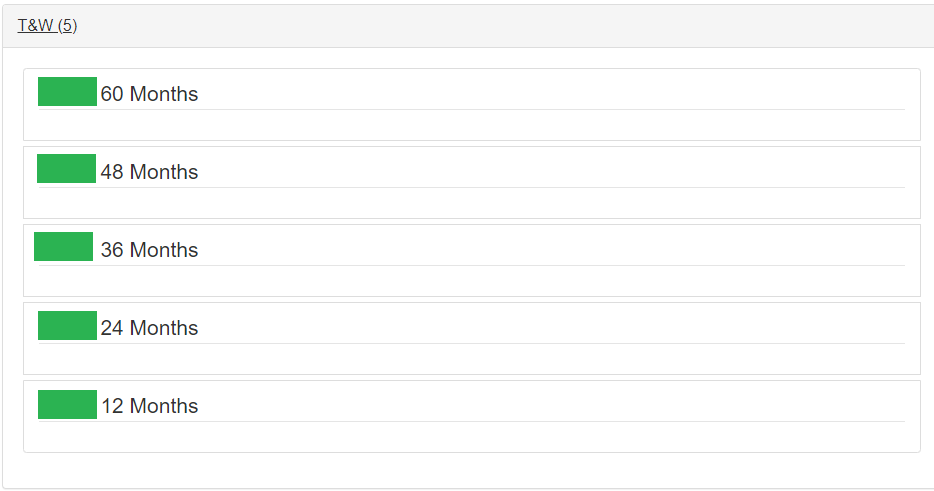
Tire & Wheel:
After clicking “Submit”, you will see a screen that confirms your selections. Scroll to the bottom of the page and click on “Proceed to Contract” to enter the customer and deal details. You can also print the quote or save the quote to return to it later:

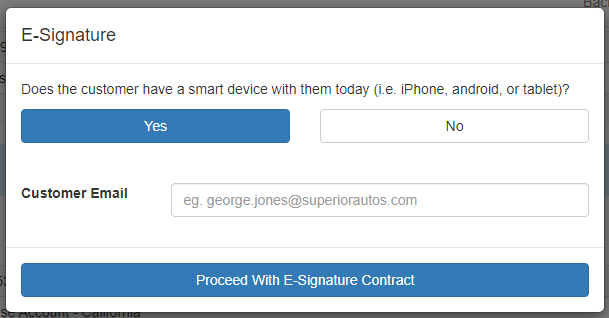
After clicking on “Proceed to Contract”, you will see a window that asks if the customer has a smart device with email. If you choose “Yes”, you will have a window that asks for the customer’s email address. Clicking on “Proceed to Contract” will take you to the next step.
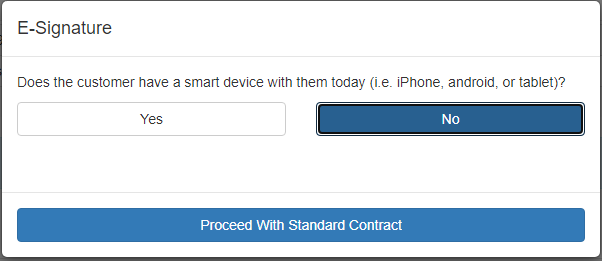
If you choose “No”, you will then click “Proceed with Standard Contract”.
Regardless of your choice of eSign or a standard contract, the next few steps will be identical. The next screen will ask for additional information about the sale and the Service Contract.

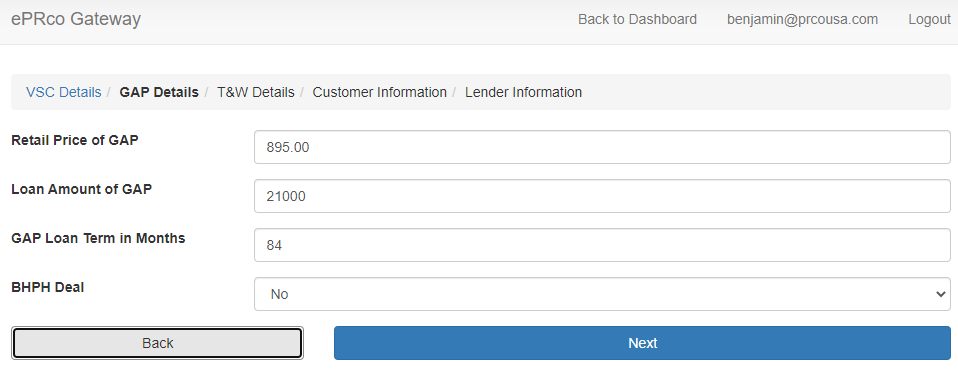
Click next to add details for the GAP contract (if included). If the sale is being financed in-house or BuyHerePayHere, you will also need to enter the Kelly Blue Book Value of the vehicle at the time of
purchase:
Click next to add details for the Tire & Wheel contract (if included).

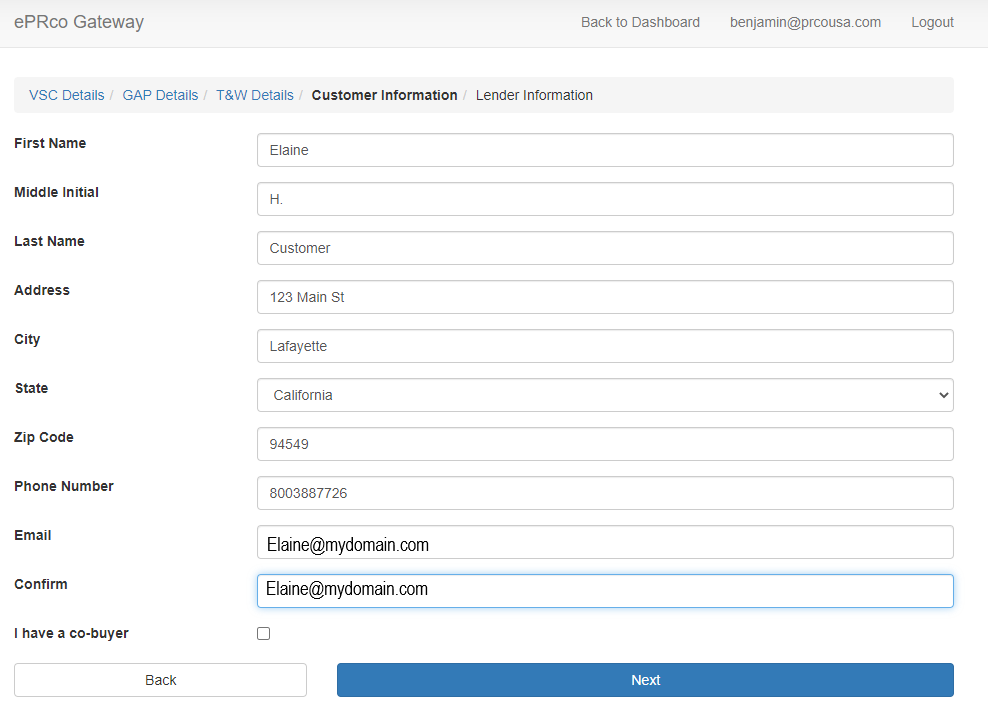
In the next screen, enter the customer information and then click “Next” as seen in the image below:
Finally, the lender information is entered in the next screen:
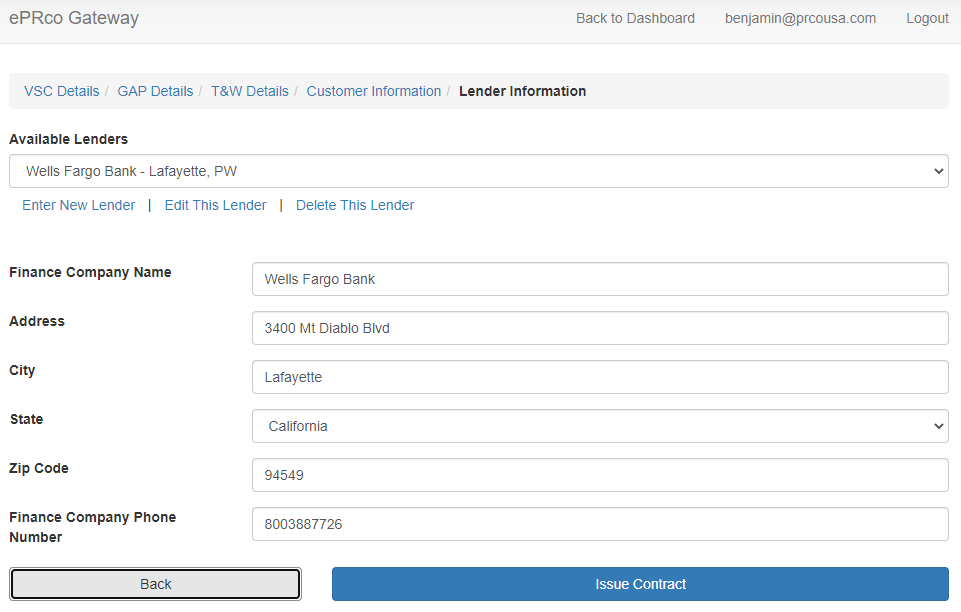
Lender information will be automatically saved and available to select from the dropdown list under “Available Lenders” for future sales.
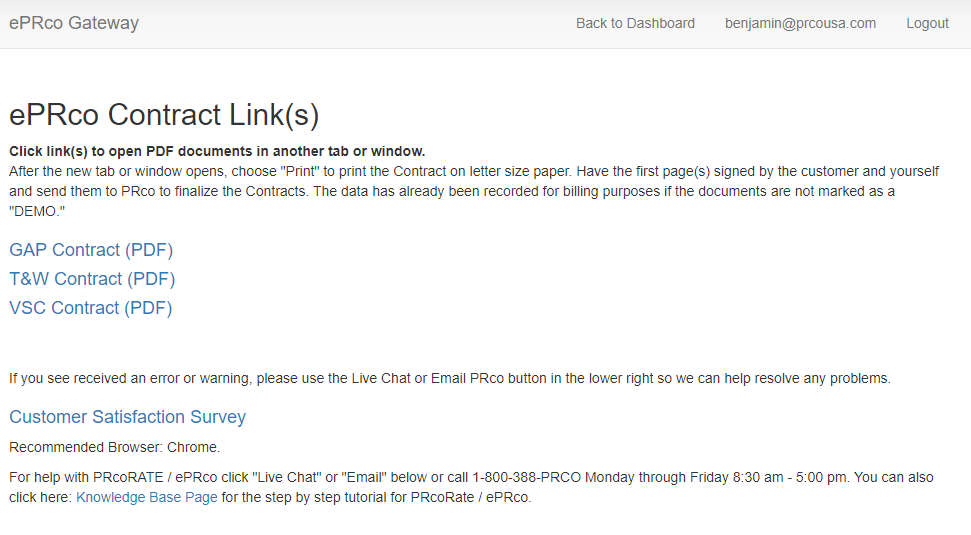
Once you are ready to issue the contract, click on “Issue Contract”. If you choose eSign, you and the customer will receive an email with a link to our eSign portal. The next screen as shown below will have either links to your completed contract PDFs or you will have a link that will take you directly to eSign if you chose that option.
Dealer Forms
Clicking on the button “Dealer Forms” in the dashboard will take you to a page that includes the PRco cancellation form and an application for Dealer Bonds.